Monday, April 30, 2012
Possible Intervention Required
OK, so I may have a problem. I went to my dentist today for a 6 month cleaning. At the end of my visit, as is their custom, they gave me a new toothbrush. But what went through my head was, "sweet, new parts cleaning brush!"
Cleaning the Carbs
So far, for cleaning the gas tank, I've tried several solvents including acetone, new gas, mineral spirits, and carb cleaner. I've tried inserting several sorts of objects into the tank before agitating including ball bearings, nuts, and fish tank gravel. I've even tried using the dyer to agitate the tank. While I'm making some progress, so far I haven't found any magical solution. I found a post online claiming that denatured alcohol would dissolve the old varnished fuel, but that it takes a long time. So I've now put a quart or so of denatured alcohol in my tank (most of the remaining gunk is at the bottom) and I am just going to let it sit for a few days. In the meantime I decided to take a look at the carburetors.
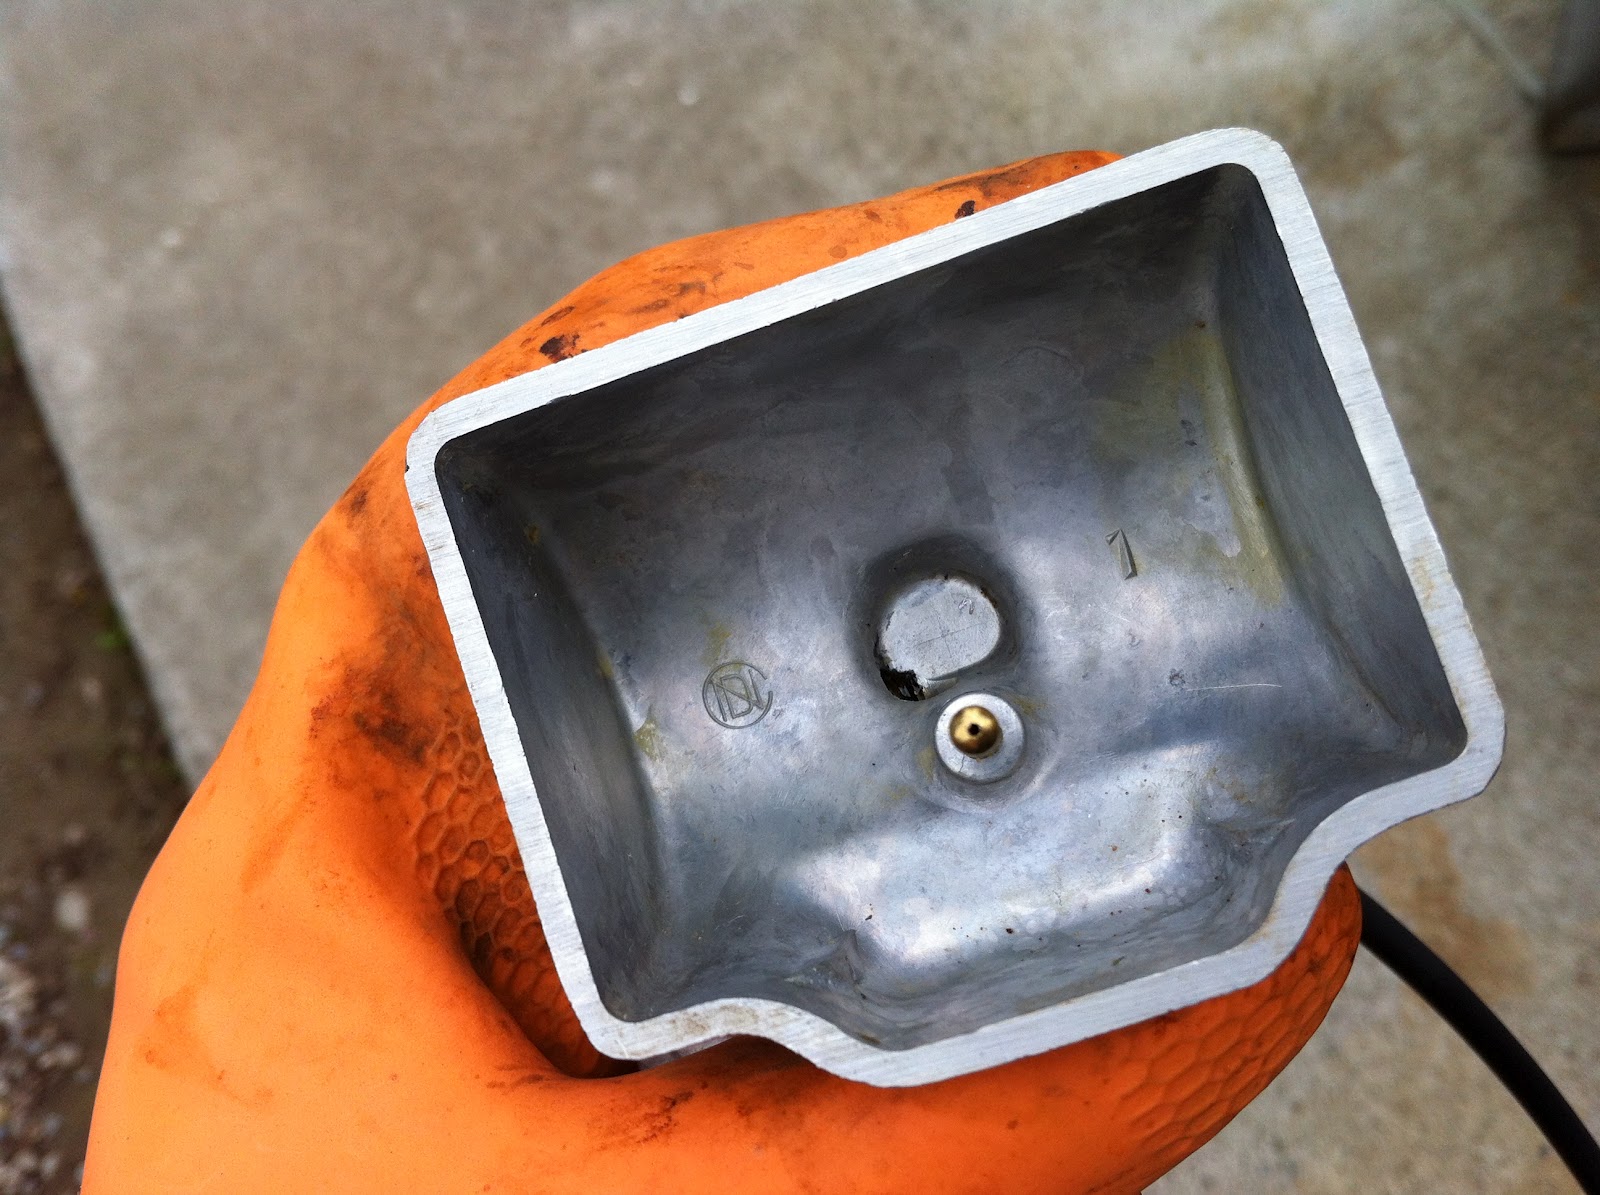
I popped the float bowl off of the bottom of one of the carbs and took a look inside. It had some pretty nasty stuff inside. I decided that I was going to have to take the carbs off of the bike to clean them out. They probably need a complete rebuild. But for now I am going to try and get away with a cleaning.
First, I had trouble removing the carbs from the bike. The throttle cables on this bike are not attached to the carbs externally, but rather go inside the carb and attach to a piston that is moved up and down inside of the carburetor by the twisting of the throttle lever. The cable cannot be detached (and therefore the carbs cannot be removed) unless the pistons are removed from the carbs. However, on both carbs these pistons were frozen in place. After some wresting and liberal use of carb cleaner I managed to get them free.
Here are some pics of the carburetors removed from bike and before and after cleaning pics. I'm not sure if I cleaned everything I needed to, but I did make sure that, for each carb, the main jet was clear, the needle valve moved, the floats were free of goo, and as I mentioned before, the throttle piston was free.
I popped the float bowl off of the bottom of one of the carbs and took a look inside. It had some pretty nasty stuff inside. I decided that I was going to have to take the carbs off of the bike to clean them out. They probably need a complete rebuild. But for now I am going to try and get away with a cleaning.
First, I had trouble removing the carbs from the bike. The throttle cables on this bike are not attached to the carbs externally, but rather go inside the carb and attach to a piston that is moved up and down inside of the carburetor by the twisting of the throttle lever. The cable cannot be detached (and therefore the carbs cannot be removed) unless the pistons are removed from the carbs. However, on both carbs these pistons were frozen in place. After some wresting and liberal use of carb cleaner I managed to get them free.
 |
| Piston in carb that is attached to throttle cable |
Here are some pics of the carburetors removed from bike and before and after cleaning pics. I'm not sure if I cleaned everything I needed to, but I did make sure that, for each carb, the main jet was clear, the needle valve moved, the floats were free of goo, and as I mentioned before, the throttle piston was free.
 |
| The carbs removed from the bike |
 |
| Junk in the float bowl |
 |
| Junk on the bottom of the float |
 |
| Clean bowl |
 |
| Reasonably clean floats, jet, etc. |
Sunday, April 29, 2012
Mechanical Agitation - Round 2 (Where the Tank Gets Really Agitated)
Step 1, remove petcock from bottom of tank. This provided another peek at the state of the fuel in the tank.

This time I wasn't going to mess around with the manual shake-shake-shake. I needed a more serious, mechanical method of providing the agitating action. I decided to try a method I saw on YouTube where a guy filled the tank with objects to scour the inside of the tank while rotating it in an ordinary clothes dryer. Here is a video clip and a few pics to illustrate the setup.
OK, so I dried out the tank as best I could, added about 2/3 of the bag of fish tank gravel, and spun it in the dryer for an hour (air only, no heat), rotating it half way through. I had high hopes for this process. In the YouTube video that I watched, when the guy was done spinning his tank in the dryer, he dumped out a big pile of pulverized rust powder. This is what I was expecting. This is what I got.
Although you cannot actually see into the tank in the video, trust me that it is still filthy. I did manage to find 15 of the original 18 ball bearings. Well, back to the drawing board I guess.

This time I wasn't going to mess around with the manual shake-shake-shake. I needed a more serious, mechanical method of providing the agitating action. I decided to try a method I saw on YouTube where a guy filled the tank with objects to scour the inside of the tank while rotating it in an ordinary clothes dryer. Here is a video clip and a few pics to illustrate the setup.
 |
| The tank in a nice secure bundle |
 |
| Tank bundle in the dryer |
 |
| Dryer half packed in with filler |
 |
| Dryer packed and ready to begin tank agitation |
Although you cannot actually see into the tank in the video, trust me that it is still filthy. I did manage to find 15 of the original 18 ball bearings. Well, back to the drawing board I guess.
Friday, April 27, 2012
Mechanical Agitation - Round 1
I have a multi-stage plan for getting the gunk and the rust out of the tank. In step 1 I was primarily concerned with getting out the old fuel. I used a couple of cups of acetone as well as a handful of ball-bearings. I was careful to count the ball bearings before adding them to the tank so that I could later be sure that I had removed them all. Here they are, all 18 of them.

I let the acetone soak for a while, with the tank sitting on each side. Then I agitated the tank by manually shaking it. Then I dumped the acetone into a container, through a screen to capture the bearings. I counted the bearings, beginning with zero, until I reached ... zero. None of them came out. They are all still trapped in the gunk and debris. Clearly more cleanings are required.

I let the acetone soak for a while, with the tank sitting on each side. Then I agitated the tank by manually shaking it. Then I dumped the acetone into a container, through a screen to capture the bearings. I counted the bearings, beginning with zero, until I reached ... zero. None of them came out. They are all still trapped in the gunk and debris. Clearly more cleanings are required.
Thursday, April 26, 2012
Tank Cleaning Begins
I took the gas tank off of the bike to begin cleaning.

While removing the fuel lines from the fuel cock assembly, one came off clean, the other not so much. Instead of the line coming off of the metal nipple, the nipple came off with the line. Hmmm, this could turn out to be a problem later, we shall see.

I dumped out the old fuel. It came out a nasty brown/black mess. But what is worse, the tank is full of big chunks of rust.


A Peek in the Gas Tank
So the first place I decided to look, to assess the internal condition of the bike, was the inside of the gas tank. I removed the cap and several brown chunks fell away onto the top of the tank and onto the ground ... not a good sign. The smell that came wafting up from the tank was that smell that old gasoline takes on only after it has turned to varnish. If you've smelled it, you know what I am talking about. Also not good, but to be expected given that it has been sitting for some time. Here is peak into the tank:


Hasn't Run in a While
I should probably mention at this point, before anyone gets irate that I am thinking about modding such a fine original specimen, that I am now leaning towards keeping this bike original. Though my original plan was to build a cafe racer, the enduro-ness of this bike has a lot of character.
When Gary and I were discussing the mechanical condition of the bike, he mention that it ran when it was parked, but that it hadn't been run in "a few years". Here are the tabs on the back:

So, it was last last registered 25 years ago. Now, Gary mentioned that he used to take the bike camping, so perhaps he just didn't register it. But I should probably ask him. So, it hasn't run in somewhere between 3 and 25 years.
Losing the passenger seat
Given that this is a small displacement bike, I see it more as a solo rig. I decided to remove the pillion seat. Plus, I prefer the look. So, here is what the bike looks like without the extra seat.
 |
| Pillion Seat Removed |
Wednesday, April 25, 2012
From Whence It Came
A couple of months back I posted on G+ that I was thinking about undertaking a cafe racer project this summer. The exact content of that post was the following [pic omitted]:
"I'm really feeling like doing a cafe racer project this summer. Nothing as fancy as the pic, I was thinking more of a cheap rat bike. I'm not sure if I have the funds, know-how, or time. But I like the idea."
Well, recently I began searching the classifieds for a cheap, probably non-running, but decent bike to start from. Something that would be a good platform, but that someone with only moderate mechanical ability could get running. I was a bit discouraged by what I could get with the limited funds that I had on hand. That was until my wife began talking to my neighbor Gary about a bike that he had been storing in his garage for some time. It turns out that Gary had a 1971 Honda SL350 that he was willing to part with if I was interested in a good starter bike. He said that he would give me a "deal that I couldn't refuse". Indeed he did, thanks Gary! And Charity! Here is the bike the day that it arrived at my house, yesterday 4/24/2012.

This bike, by all outward appearances, is in much better condition than what I was expecting to start with. But the true nature of its mechanical condition remains to be seen.
"I'm really feeling like doing a cafe racer project this summer. Nothing as fancy as the pic, I was thinking more of a cheap rat bike. I'm not sure if I have the funds, know-how, or time. But I like the idea."

This bike, by all outward appearances, is in much better condition than what I was expecting to start with. But the true nature of its mechanical condition remains to be seen.
Subscribe to:
Posts (Atom)